
Step into the Enchanted Forest of Eternity with a craft that feels like a tiny doorway into the Santaverse.
This layered art craft is inspired by a tunnel book, a paper structure made from cut panels placed one behind another to create the illusion of depth and perspective. When you look through the front, it feels like peeking into a miniature world.
For this tutorial, you’ll create your own Enchanted Forest scene using painted paper layers, careful cutouts and a little Elf Mates imagination.
What You’ll Need
- 6 sheets of watercolor paper or card stock, 300 gsm, cut to 5″ x 7″
- 2 pieces of watercolor paper or card stock, 300 gsm, cut to 5″ x 5.5″
- Ruler
- Paintbrushes in various sizes
- Acrylic gouache paint
- Sharp craft knife
- Cutting mat
- Paint pens, if desired
- Glue
Because this project uses a sharp craft knife, please ensure appropriate supervision.
What Is a Tunnel Book?
A tunnel book is made from a series of flat panels that come together to form one dimensional scene. Each layer shows part of the picture, and when they are stacked, the artwork gains depth.
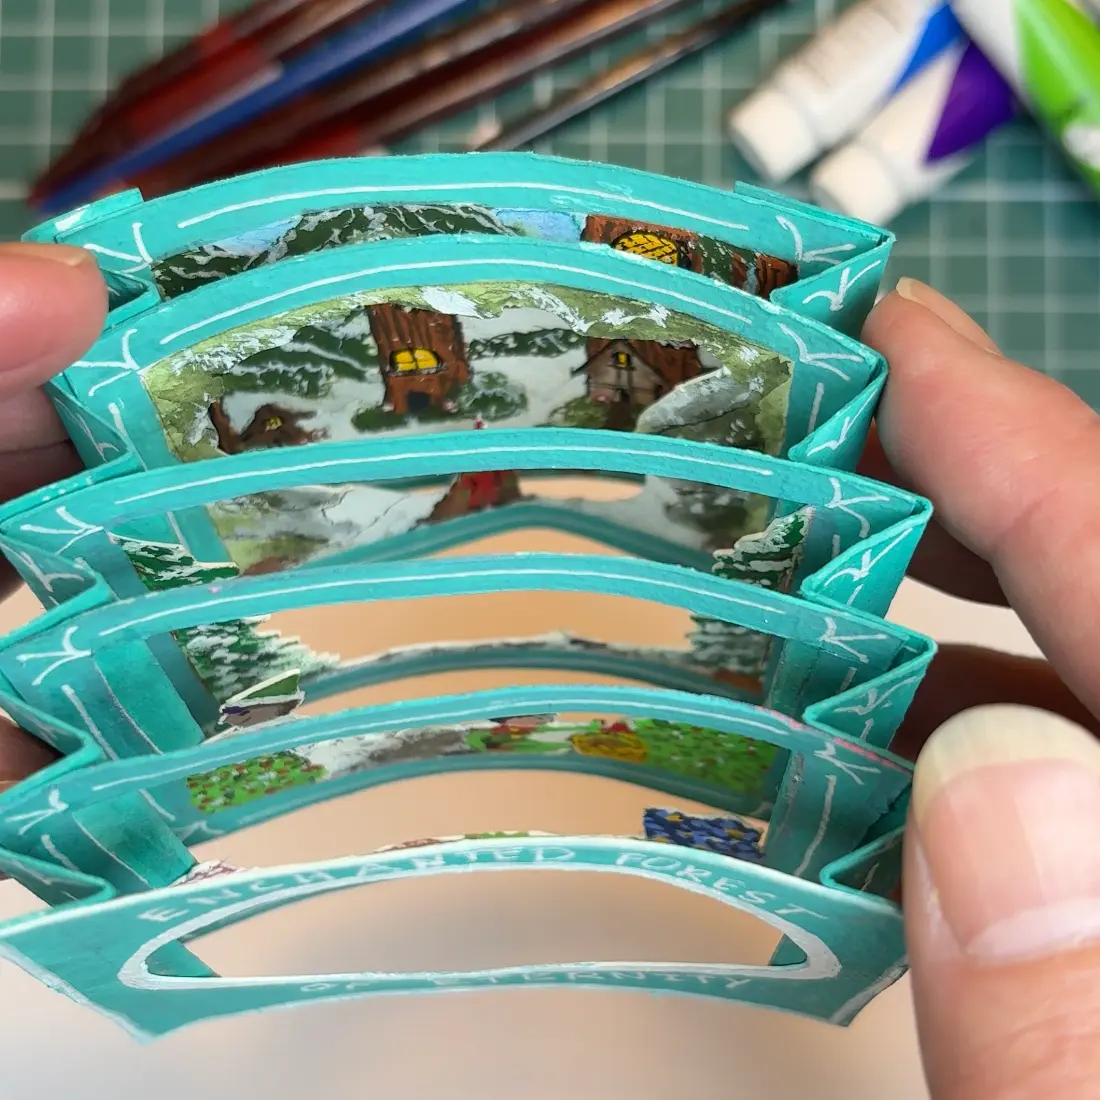
In your Enchanted Forest tunnel book, the elements closest to the viewer will be painted on the front layers. Elements farther away, like distant trees or cottages, will appear on the layers toward the back.
Think of it like creating a little window into the Elf Mates’ world.
Step 1: Plan Your Forest Scene
Before painting, decide what will appear on each layer.
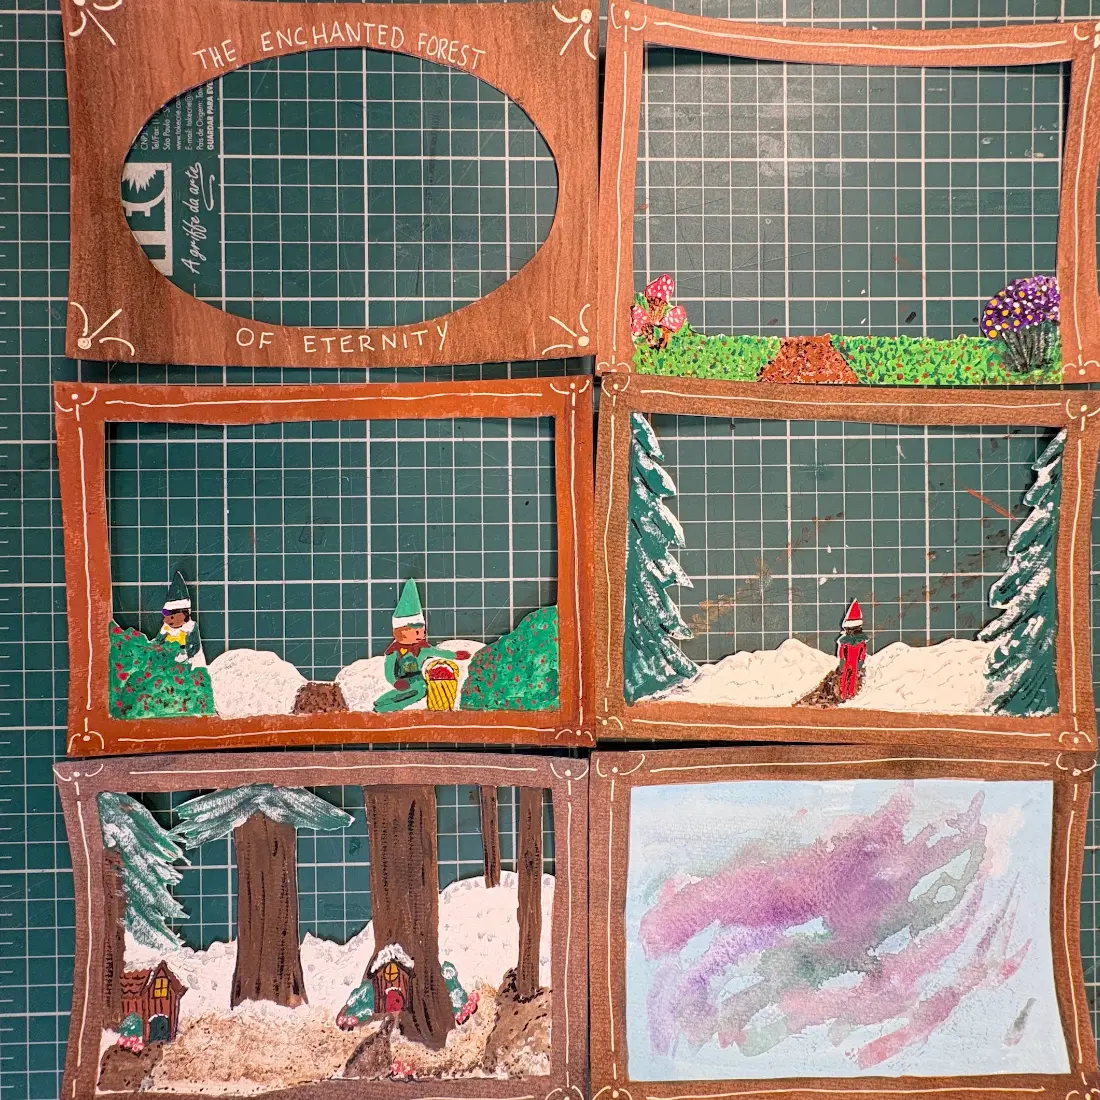
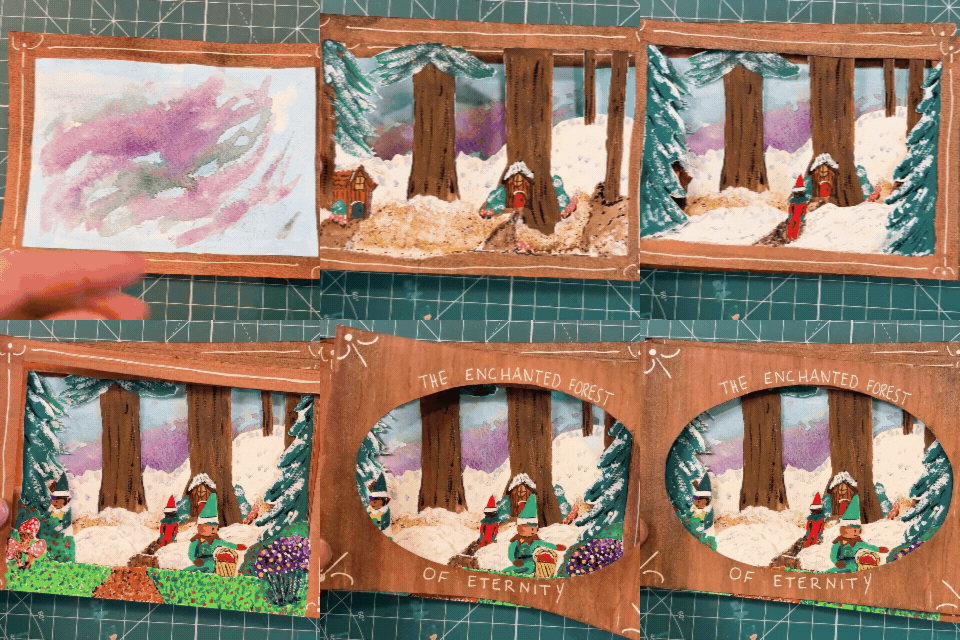
We layered the Enchanted Forest tunnel book as follows:
- Top Panel: An oval cut in the center. (We decorated it with fir branches around the opening and in the corners after we took this picture.)
- Second Panel: A grassy field with mushrooms on the left and a plant with purple flowers on the right. A dirt path runs through the center.
- Third Panel: Two Elf Mates, one on the left standing behind a bush, and one on the right sitting beside a bush with a basket. The path continues through the center between them.
- Fourth Panel: Two tall pine trees frame the scene on either side, stretching from top to bottom. An Elf Mates Chef walks down the path in the center.
- Fifth Panel: Tall fir trees with tree cottages and glowing windows, set in front of snowy hills.
- Sixth Panel: The northern lights painted across the sky in the background.
As you plan, remember that the unpainted areas on panels 2 through 5 will be cut away later to reveal the layers behind them. This is what creates the depth and peek-through effect of your tunnel book. The backmost layer will stay solid and uncut, so save your farthest background details for that sheet.
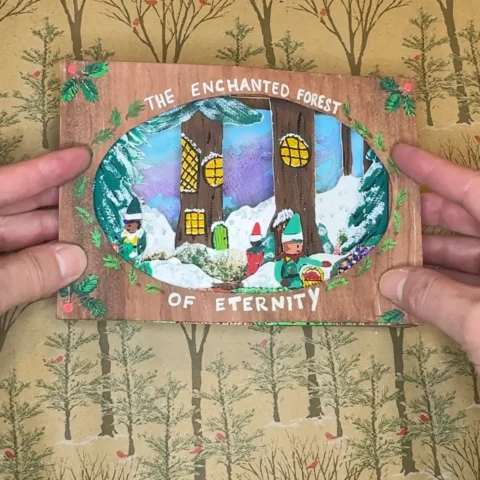
Step 2: Create Your Front Cover
Use one 5″ x 7″ sheet for the front panel.
Draw a large oval opening in the center. Carefully cut out the oval using an X-Acto knife on a cutting mat. This will become the window where viewers peek into the Enchanted Forest of Eternity.
Paint the border around the oval. You can add vines, leaves, mushrooms, lettering or small magical details.
Step 3: Paint Panels Two Through Five
On the next four 5″ x 7″ sheets, lightly draw a .5″ border around each panel.
Inside that border, paint the different layers of your scene.
- Panel 2 should show the closest details
- Panels 3 and 4 can show middle-ground elements
- Panel 5 can show trees, cottages or snowy shapes farther away
Leave open space (which you will cut away) where you want the viewer to see through to the next layer.
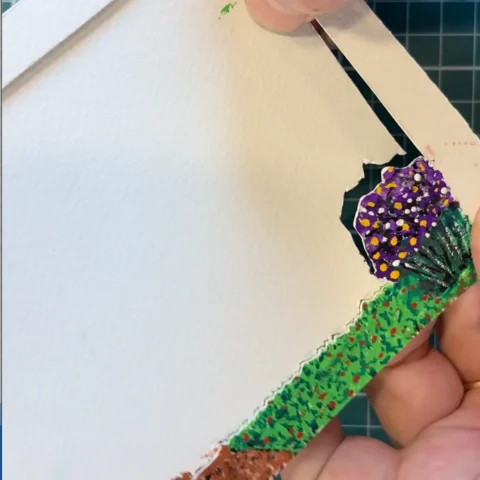
Once the paint is dry, cut out all unpainted spaces inside the .5″ border. Be sure to keep the painted sections connected to the frame so each panel stays sturdy.
Step 4: Paint the Back Panel
The final 5″ x 7″ sheet is your background. Lightly draw a border .5″ from the edges.
Do not cut this layer.
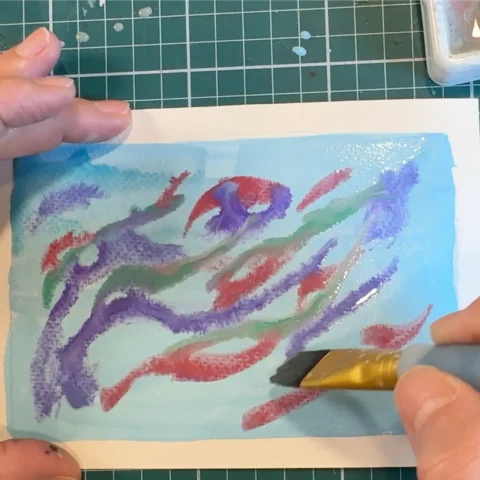
Paint the farthest part of your scene here, such as a glowing sky, distant trees, snowdrifts or softly lit cottage windows. This layer provides the backdrop for the entire scene.
Step 5: Make the Side Folds
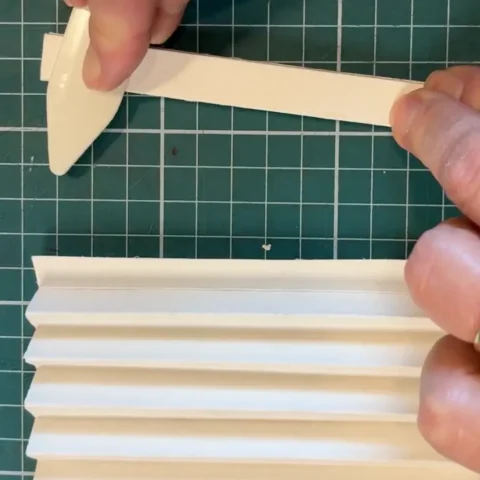
Take the two 5″h x 5.5″w pieces of watercolor paper or cardstock. Use a ruler to mark .5″ segments across width.
Fold each one accordion-style to create the side supports for your book. These folds will hold each panel in place and allow the scene to open with depth.
Step 6: Glue the Layers in Order
Lay out your panels in this order:
- Solid background
- 5th panel (tree cottages)
- 4th panel (Fir trees, Elf Mate on path)
- 3rd panel (Elf Mates picking berries)
- 2nd panel (grass layer with mushrooms and flowers)
- Front oval cover
Take one accordion piece and open it slightly so you can see each folded section.
Starting with the solid background painted panel, glue one edge of the panel to the last flat section of the accordion. Attach the other side of the panel to the matching section on the second accordion piece.
Allow the glue to dry.
Next, move forward one fold on the accordion. Glue the 5th panel to the next flat section on both sides.
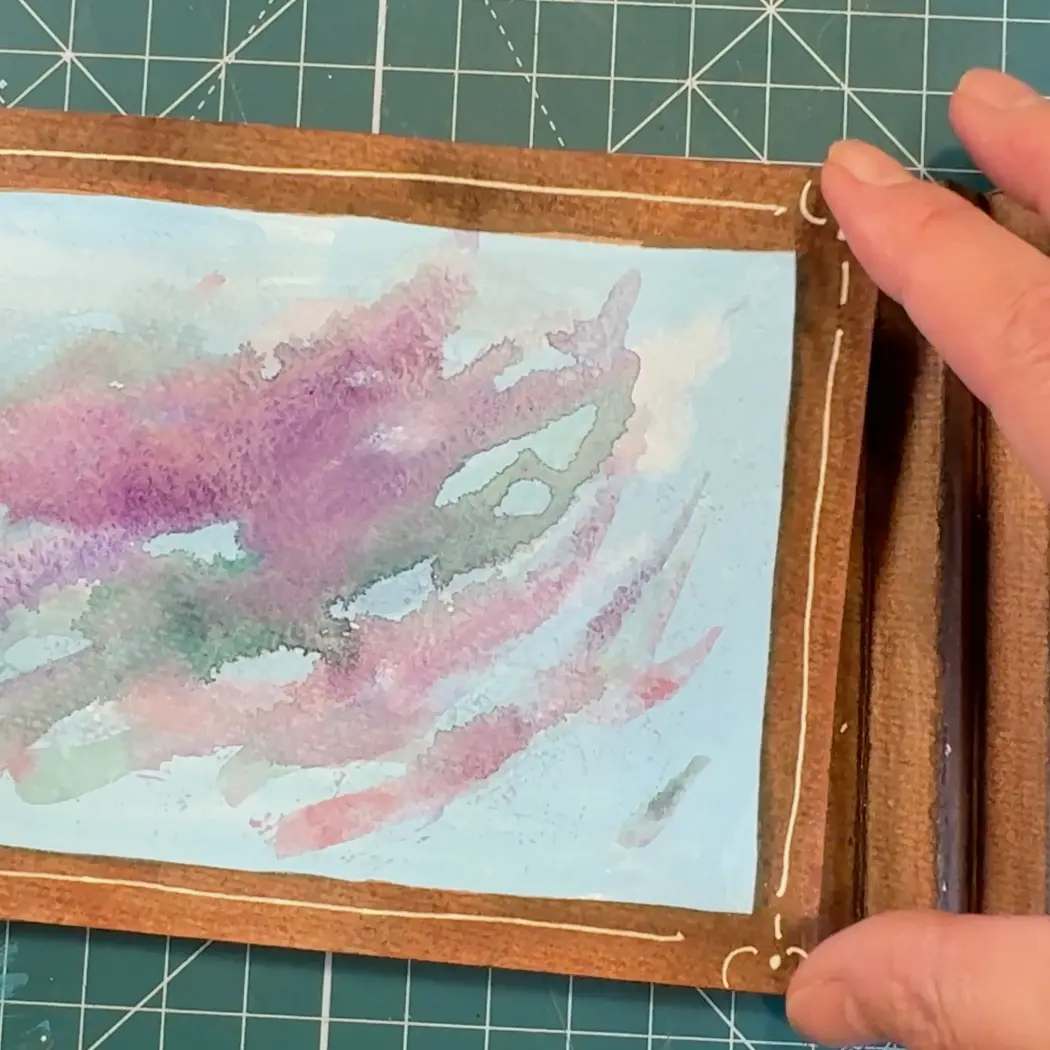
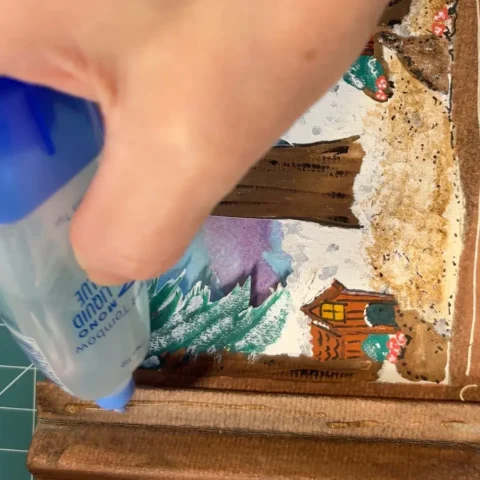
Continue this process, attaching each panel to the next fold in order, moving from back to front.
Finish by attaching the front panel with the oval cutout to the front-most flat section of the accordion.
Let everything dry completely before gently opening and closing your book.
Step 7: Add Final Details
Once assembled, add finishing touches with paint pens, if desired.
You might add small dots of snow, glowing windows, leafy vines, mushrooms or tiny details that make your forest feel alive.
You may also add flourishes along the outside of the accordion edges.
Just like the Elf Mates, your forest can reflect the kind of magic you want to bring into the world.
Watch the Process
Bring the Enchanted Forest Home
The Enchanted Forest of Eternity is where creativity takes root, and this tunnel book lets you build a small piece of that world with your own hands.
Santa sends the Elf Mates from the Enchanted Forest into the world to inspire creativity, imagination, sharing and caring all year long, and this handmade forest gives you a special way of joining them in their mission.
Learn more about the Enchanted Forest of Eternity and explore the map of the Kingdom of the One True North!